The footnote function is one of the great features of Word: it will automatically change numbering, place them in order at the bottom of the page, shift them as pages grow and shrink, and renumber when they are moved around. The endnote function is similarly great. And even better, you can use both in one document!
However, editing footnotes and endnotes poses some challenges. Sure, Word will track changes you make to the words in the note, but it doesn’t handle other edits quite so smoothly, as shown in the demo video below.
Several comments were split into tiny bits and populated all following comments.
Word malfunctions in myriad ways, but sometimes it gets borked in SPECTACULAR ways. I have seen it completely obliterate any copy of the file, as though it borrowed the infinity gauntlet. It has spread a comment into tiny bits over the subsequent comments (see image). It has caught the vapours and decided it simply cannot show tracked changes anymore or run spellcheck…
Right on the Home ribbon in MS Word you’ll find a Sort button. It’s handy for alphabetizing, to be sure, but you can use this as a hack to find duplicates in a bibliography too.
Some bibliographic styles list references in the order they are mentioned within the body of the text. This means they’re in 1, 2, 3 order rather than alphabetized by author name. Especially when a text is team written, duplicate entries can happen, and they’re hard to find when the bib or refs list is long.
Sort, to the rescue! With a couple steps, first. Watch the demo video or follow the 3 easy steps below.
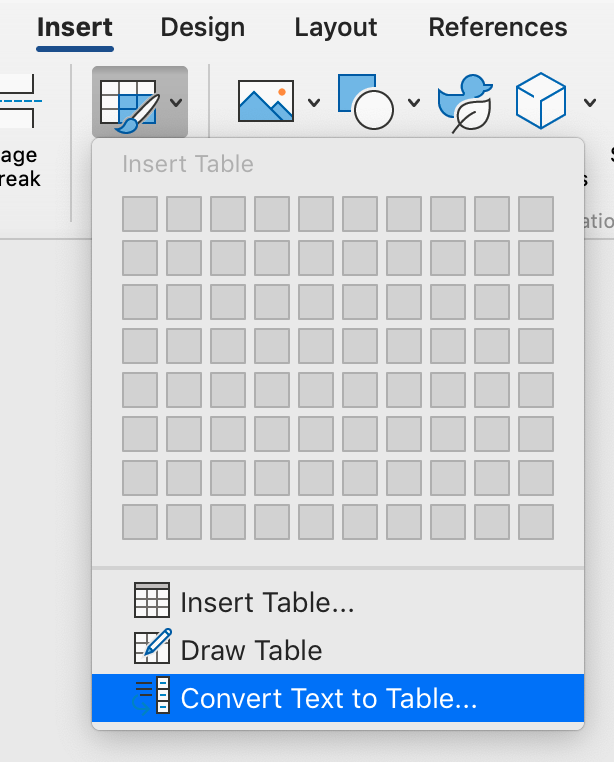
If your version of MS Word doesn’t have menus, go to the Insert ribbon and click the Table icon, then select Convert Text to Table.
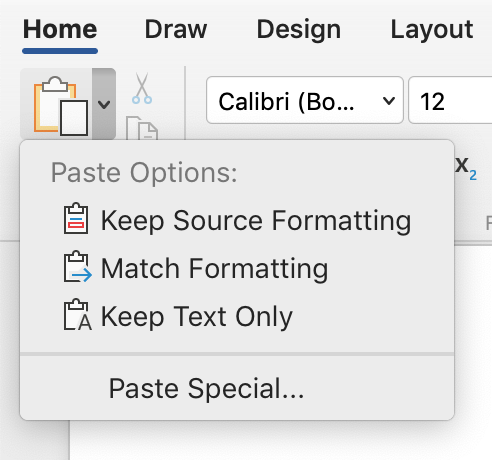
Copy the reference list to a new doc, but when you paste, select Keep text only from the options in the Paste icon on the Home ribbon.
Select all, then select Convert Text to Table either from the menu, as shown in the demo, or from the ribbon as shown in the image below.
Place the cursor in the table, then select the A→Z sort icon on the Home ribbon (beside the ¶).
Tell Word to sort by column 2, and you’re ready to skim the list for duplicates.
This sort trick can also help you spot small inconsistencies in author names, such as Departmentfor defence vs Departmentof defence.
Troubleshooting
Do this in a new document, so you don’t mess with the formatting of the original.
To maintain the auto numbering in the original document, make your changes by hand rather than pasting a revised list back into the original.
Never miss a Word-Wrangling Wednesday tip. Sign up to get them by email. By practicing one tip each week, you can invest 13 hours this year into professional development. To search the blog, use the red-orange bar just above this paragraph.
Want more productivity boosters? Turbo boost your skills and get Word to do the heavy lifting for a change. Buy the full self-study course and get 115 pages of editor-specific instructions for making the most of MS Word 365. Includes dozens of demo videos for both Mac and Windows users. Field tested since 2011 with editors around the globe.
Got a gnarly Word problem? Submit your problem and we’ll try to answer it in the Q&A thread.
Curly quotation marks curve in, toward the content that they bracket.
They look nice, and some would say they facilitate reading ease. But curly quotes can cause snafus with macros, wildcards, and content management systems (CMS) like online education interfaces and website back ends. And sometimes Word just doesn’t want to create a mark with the right curl. Here’s how to fix those snags.
Correcting the Curl
If your quotes (or apostrophes) are simply facing the wrong way, the easiest thing to do is type a second mark beside it then erase the wrong one. Or, use one of the keyboard shortcuts listed in the table below. Alt codes work on both operating systems but Mac users may have to turn on the alt codes (or even the unicode) keyboard first. Windows users should type the first two keys together, then press the keys that follow the comma.
Alt Code
Mac
Windows
‘
opening single quote
alt + 0145
opt + ]
‘
’
closing single quote
alt + 0146
opt + shift + ]
ctrl + ‘, ‘
“
opening double quote
alt + 0147
opt + [
shift + “
”
closing double quote
alt + 0148
opt + shift + [
ctrl + ‘, shift + “
Solving F&R Errors
If your find and replace string isn’t working, or it is royally messing up the manuscript, try replacing all the curly quotation marks with straight ones before you run the F&R. Then change them back.
Not nearly as flavourful as that paste we ate in preschool, but maybe more useful, Word has several options for you to paste content with. Get at the the options from theribbon. Just click the little down arrow beside the Paste button on the left end of the Home ribbon to see the options.
They got rid of Clippy but not many of the other annoying automated features in MS Word. Automatic formatting is something that most editors want to turn off before they work. In fact, this is why turning off most automation is covered in the “Get Ready to Edit” section of the book.
When you get a document in which all of the URLs (web addresses) are blue and underlined, and active (hyperlinked), you’ll most likely want to remove them so they don’t cause design problems or (horrors!) end up in print. You can do this one at a time, or in one fell swoop (globally).
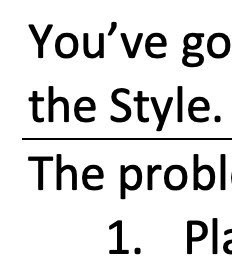
You’ve got a line
under a paragraph that you can’t get rid of. You’ve checked underlining and the
Style. You’ve deleted the final hard return, the pilcrow mark. But the line
persists.
The problem is likely
a border. Getting rid of it can be easy:
Place the
cursor in the offending paragraph.
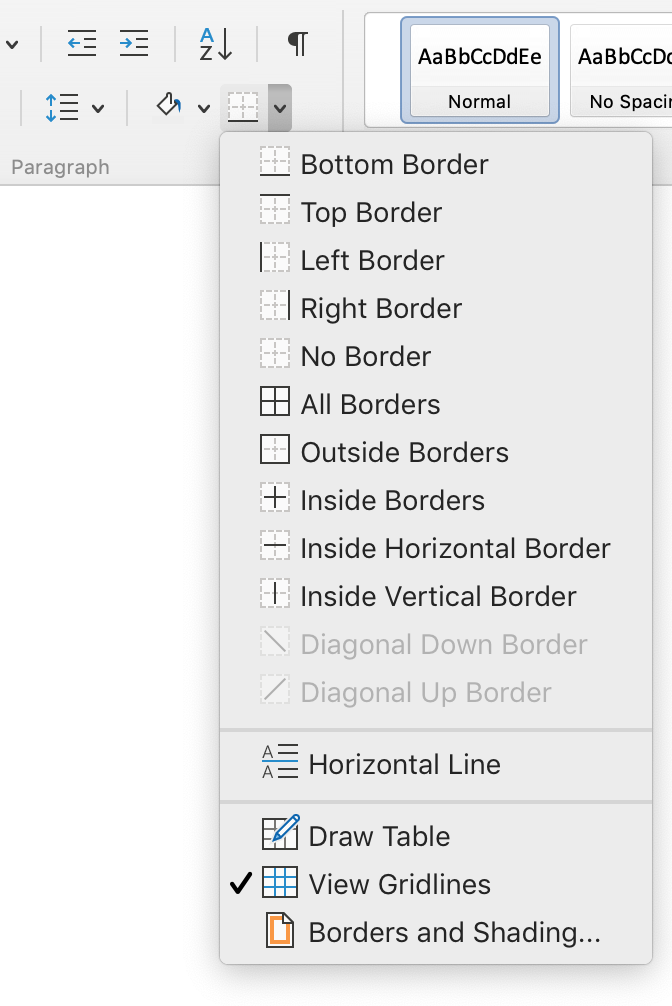
On the Home
ribbon, look in the Paragraph group for the little grid, below the pilcrow
icon.
Click the
little down arrow on the right side of that grid icon.
Deselect
Bottom Border.
Troubleshooting
It might be a Top Border, if deselecting Bottom Border didn’t work, try placing the cursor in the paragraph below the line, then deselecting Top Border.
If the line keeps coming back, or is applied to every paragraph, check the Style settings for that text (usually Normal). The border may be specified right in the Style so Word keeps reapplying it, “helpfully.”
It’s possible to Select All of the document and deselect the border for all text in the document. This will also affect tables in the text but will not change the Style settings, so lines may appear in new paragraphs.
Sometimes a table seems stuck in its alignment. No matter how many times you select the whole table and set paragraph alignment, it won’t budge. The trick is to drag the table using its grab point:
Hover over the table until the grab point pops up. That’s the 4-way arrow at the top left corner of the table.
Click on the grab point and drag the table where you want it.
Hover the cursor over a table to make the grab point appear.
To make sure the table aligns with the margins, reveal the ruler by checking the box on the View ribbon.