Editors sometimes use highlighting in MS Word to flag content. My publisher clients have asked me to highlight design and production instructions within the text, and I use highlighting to flag item for fact checking or a second look. (Design instructions include things like [table near here] and [note this is a mu symbol].)
Therefore, one of my final checks on a file is to review all the highlighting. Word makes this easy, using the Advanced Find and Replace to skip through all instances of highlighting.
- Mac users can open Advanced Find and Replace either from the Edit menu (Edit > Find > Advanced Find and Replace) or by clicking the gear icon in the left-hand Search panel.
Windows users can click the down arrow in the Navigation panel.
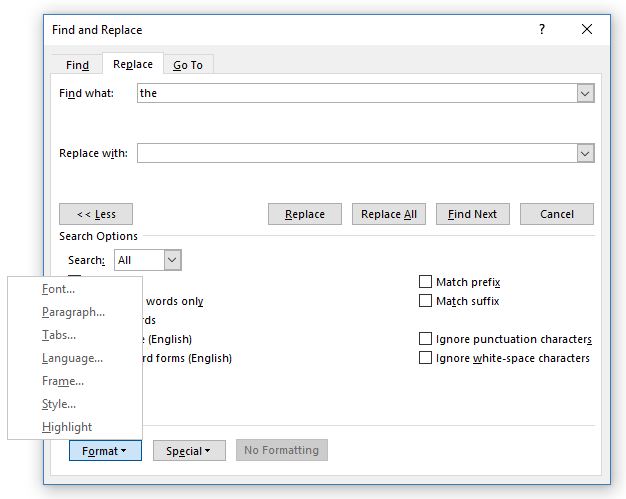
(See screen shots below.) - Expand the dialogue box by clicking the button on the lower left corner. On a Mac, it’s just an arrow. Windows users will see the word “more” with arrows. It should now look like the image here.
- Click the Format button, and select Highlight.
- Click Find. It’s that easy!


Searching for highlighted text is one of the last checks I do while editing a manuscript. That lets me address any lingering items I had flagged, and remove all unnecessary highlighting so it doesn’t get into “print.”
Pro tip: Once you have found a highlighted item using this method, you can exit the Advanced Find and Replace and simply use keyboard shortcuts to find the next instance of highlighting, and then the next, and so on.
Mac, find next: cmd + pg down
Windows, find next: ctrl + pg down

