Styles are applied to many good ends, in Word: production workflow, ebook coding, and making restructuring easy, to name a few. There are several easy ways to apply styles, too!
In this exercise, you’ll practice applying Styles and using the Outline View.
Heading levels must be indicated in the manuscript in some way. Heads can’t simply be formatted as body text—even boldfacing will help the designer as much as the editor. And the reader absolutely needs them.
Left and right alignment aren’t going to cut it when aligning numbers in tables. Best practice to align numbers on the decimal. Aesthetics dictate that the numbers also be centred. Tab settings make this process elegant, and the ruler makes it intuitive. See it in action in the demo video at the end, and read the steps below.
Select the cells whose contents you want to align by clicking and dragging across them.
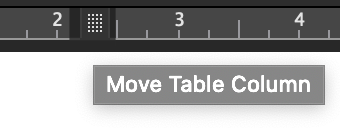
On the ruler (revealed via the View ribbon), click the left corner edge several times to change the tab mark selection to “decimal align” (the up arrow on a point, shown at right).
Click on the ruler to place the tab.
Click on the tab mark and drag it along the ruler to adjust its placement.
Word is not a layout tool, but sometimes, it is what you have to use. Compositors also appreciate having table formatting close to ideal, so editors end up tweaking alignment frequently.
Sometimes column edges don’t align. There are a number of ways this can happen. Sometimes fixing it is easy, and occasionally, its the very opposite of easy. To make this task easier, be sure that the cell borders are visible, then try the fixes shown in the demo video at the end of the written instructions.
Drag the edges of the cells
The resize cursor.
With no table contents selected, hover over the border between cells until you see the “resize” cursor (shown here).
Click and drag either until the cell borders line up or until it snaps to a location. Sometimes it’s not possible to make the edges line up exactly on the first try, but now you can select the other misaligned part and snap that border to the same point as the first.
From then on, the edges you’ve aligned should move as one entity.
Drag the markers on the ruler
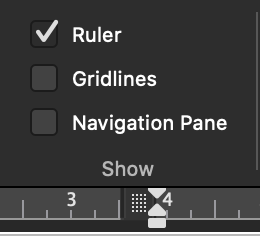
On the View ribbon, select the Ruler option.
Click in the cell you want to change.
On the ruler, click on the gutter marker between columns and drag it to the desired location.
Grab the gutter marker on the ruler to resize columns.
Troubleshooting
If a row is shorter than the others, it will not behave well. Split cells or recreate the row so that the right and left edges align with the table. (Shown in the video demo below.)
Sometimes, it feels impossible to get cell borders to align so that they create a single smooth column. The fastest fix is to insert a new row and drag the contents over, then delete the problematic row. Do watch out, though: deleting problem areas can “move contents up/left” in a way that messes up the rest of the table. On rare occasions, creating a fresh table and transcribing contents (via click and drag) is the fastest method.
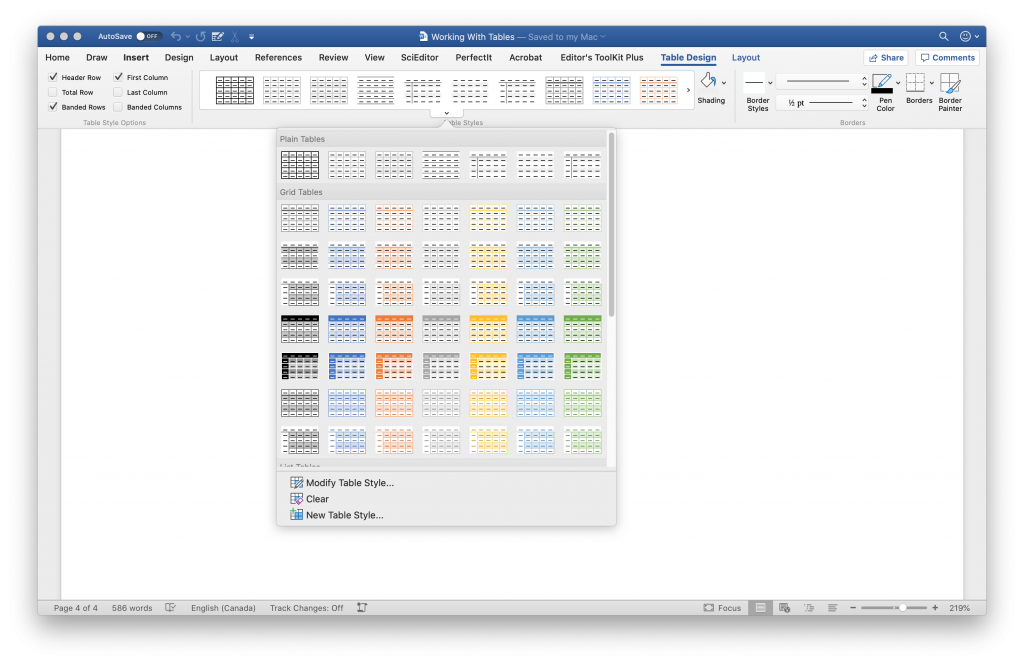
Place the cursor within a table in Word and a Table Design ribbon will appear (shown below). In the middle of that ribbon, you can choose from dozens of looks for the table. Most publishing workflows ask for simple tables with minimal “design” to them. Most style guides prefer the least possible formatting, barely even borders or “rules”. So we’ll focus on working within those parameters.
Access this panel of design options for your table by clicking the arrow at the bottom right of this group on the ribbon (in Windows) or hovering over the middle of the group and clicking the arrow tab that pops up (Mac).
If, instead, Word is the design tool (common for internal office reports and proposals, for example), start by selecting one of the options on that ribbon that fits the design specs; most likely, pick an option that from the design “theme” of the product. After that, the rest of this post applies to you, too.
Use Styles for Contents
The problem with changing the font and alignment of table contents is that if the cell contents are still set to Normal style, you’ll lose all that manual finessing the second any change is made to Normal (such as changing the alignment or first line indent) or if Normal style is “reapplied” somewhere in the document. It’s better to set table contents in their own style. So, select the whole table and create a new style for Table body, Table heads/stubs, and any other style it needs to use.
Then, you can set attributes for the table contents such as a smaller hanging indent for bullets or smaller font size by modifying each of those Styles.
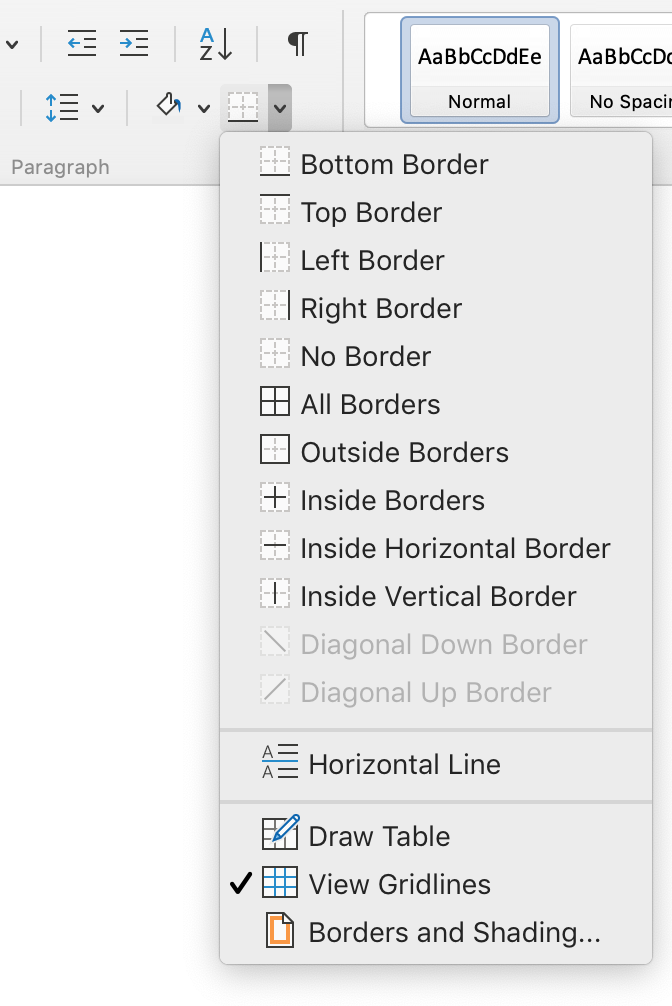
Set the Borders
On the Table Design ribbon, click the Borders icon at the right edge and apply borders (rules) to the rows and columns according to your document’s requirements. Pay attention to which cell the cursor is in, as borders are applied to that cell only. To apply borders to a whole column or row, select it first.
To Indent Cell Contents
To manually indent table contents or insert a tab space within a table cell, hitting the tab key doesn’t work. That just jumps the cursor to the next table cell! To indent contents of a cell, either move the slider on the ruler or hold down the option key, then hit the tab key. (Windows users should hold the alt key then press tab.)
Set Alignment of Contents
Left, right, or centre alignment of table contents can be set from the Home ribbon, as with any other content. It’s also possible to set margins, an indent, a hanging indent, and more on the ruler. Just drag the related element (discussed in a coming post).
To align numbers, it’s most useful to use the “align on decimal” option on the ruler.
Some of the things that make tables messy are heads that don’t span what they should, misaligned columns, data that doesn’t align, and headers that should repeat on each page. Let’s start with the first issue: getting the spanning heads right. (Check out the demo video at the end, too.)
Create spanning heads
Making a header that stretches over several columns takes just two clicks:
Click and drag over the cells you want to turn into the spanning head, then
right-click on the selection, and choose “merge cells” from the context menu that pops up.
Alternatively to step 2, you may select the Merge Cells icon on the [table] Layout ribbon shown below.
When the cursor is placed within a table, a second Layout ribbon appears. That is where you find the Merge set of icons. (Mac shown here, Windows shown below.)The Windows version has nearly identical Layout ribbon.
Word will combine all the contents of the selected cells into a single cell that spans the selected columns. It’s especially handy that all the contents are combined in cases where the writer tried to fake a spanning header. Just remember to delete the extra line breaks this merging of content creates.
Remove spanning heads
If instead, you need to make a head span fewer columns, you can select the Split Cells icon on the [table] Layout ribbon. Word then asks how many columns to split it into; enter the number of columns right and column edges should line up automatically. Next week we’ll look at how to clean them up if they don’t align.
The contents of the spanning head can be styled as you would other table contents.
Troubleshooting
Sometimes the changes that were made to a table leave all kinds of background code that make a mess of what you’re trying to clean up. Sometimes, adding a row and starting fresh is easier than fixing all the errors. Occasionally, it’s easier to create a whole new table and do it right the first time.
You may want to turn off Track Changes while you format the table as all the tracking can obscure important changes made to table contents that you want to be sure the authors do vet. A comment could be left summarizing the formatting changes if the authors are concerned.
Type 1/2 in a Word document and Word with automatically change that to stacked fraction, if you haven’t changed the default autocorrect settings. But type 2/3, and nothing happens. How can you get all fractions to match? It can take some expert typesetting.
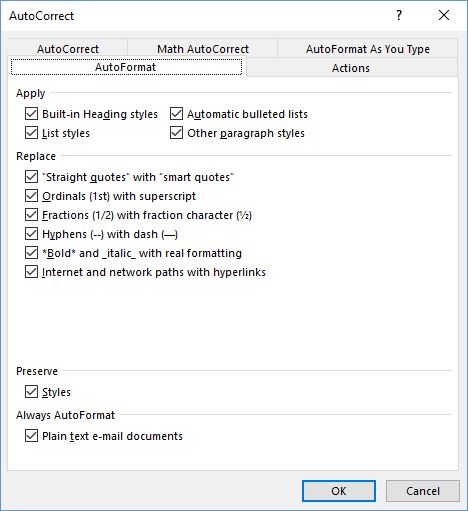
In Word’s Preferences (Mac) or Options > Proofing from the File ribbon (Windows), go to the AutoFormat tab to set whether or not fractions will be replaced with a character when one exists in that font family.
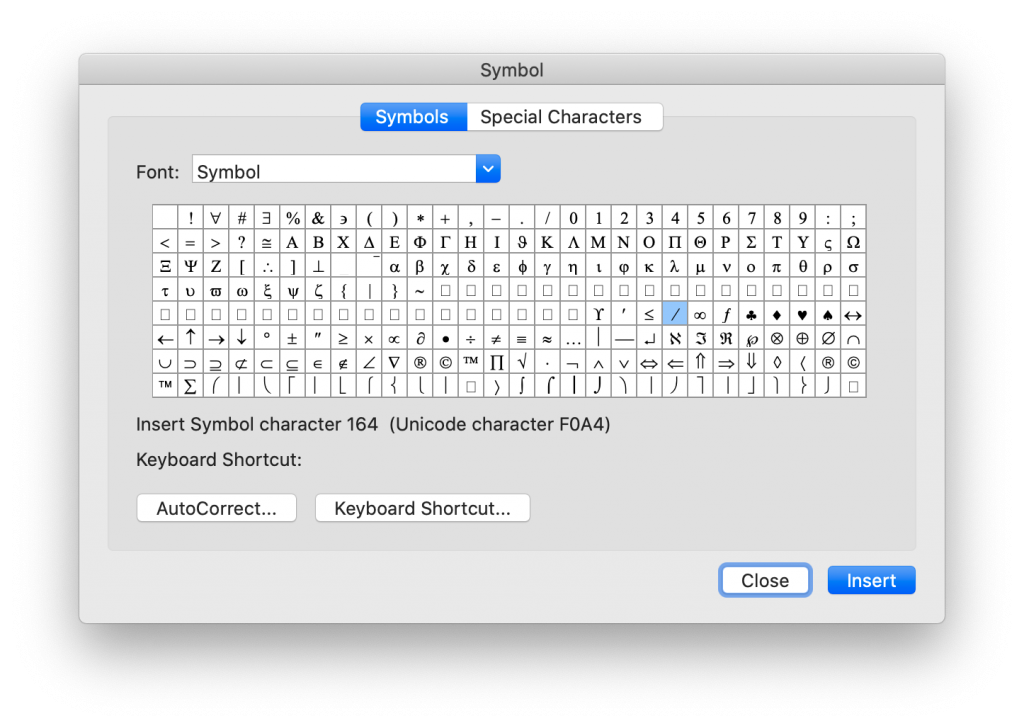
The problem is that not all fonts contain a full range of fractions, so you might not be able to insert even a common fraction like two-thirds. The character viewer in the operating system and in Word’s “insert symbol” option on the Home ribbon used to show 1/4 and 1/2 characters, but those are not appearing at the moment.
Typography experts have explained elsewhere that sometimes we just have to insert a note to the typographer in a manuscript, saying that we want a true fraction. The typographer then has to create a kind of glyph (or maybe a ligature) from scratch.
It’s weird that 2/3 isn’t built in, but odd fractions like 4/9 or 11/5 will always have to be created from scratch.
Option 1: Leave a Note to Production
Be sure to tell your compositor/typesetter in a cover letter that these fractions need to be created. Also specify whether they should be stacked with a horizontal line or a slash. In the manuscript, you might help these stand out by setting them in double [[ ]] square brackets (which is easy to search and will most likely be queried by the proofreader so they don’t make it into print).
Option 2: Create Fractions with Equation Editor
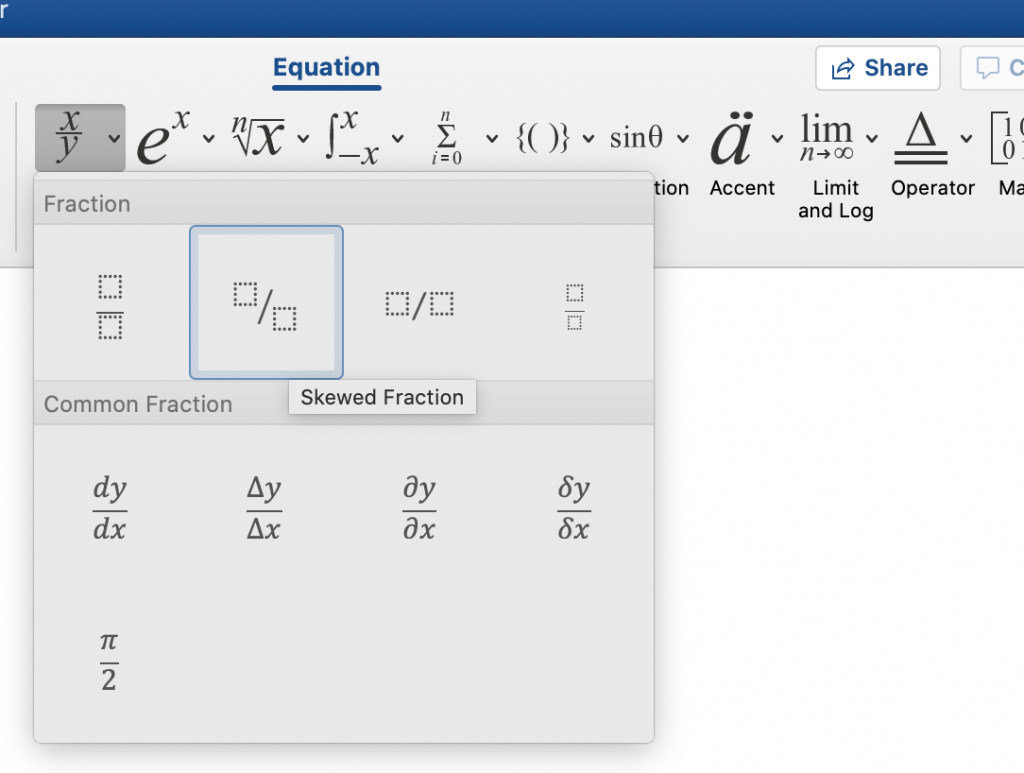
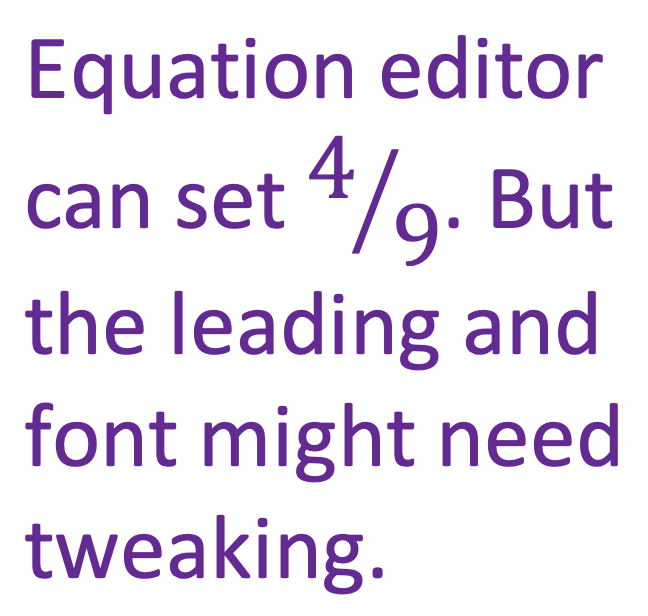
Create your own fractions in Word using the Equation icon on the Insert ribbon. Just select the stacked fraction option, then click on each box (above and below the line) to enter the numbers. This does, however, create uneven line spacing.
Clicking Word’s Equation icon on the Insert ribbon opens this Equation Tools/Design tab on a Windows computer. (The Mac version is simply titled Equation. Click the Fraction icon to start.
Select the type of fraction you would like to place
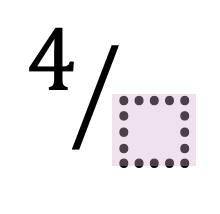
Once the equation blank is placed, click on each dotted box to enter a number.
To open this ribbon, click the Fraction icon on the Equations ribbon.
Option 3: Brute Force Equations on Your Own
If creating a special character from scratch isn’t an option (e.g., this text is being typeset for the web) then you might choose to make all fractions plain old in-line numbers separated by a solidus/slash. Or, fake it:
Through a combination of super- and subscript with a slash, it is possible to fake your own fraction ligature. To set a fraction so that it looks like a character, set the 4 as a superscript and the 9 as a subscript (using the icons on the Home ribbon).
Combine superscript and subscript numbers to fake a fraction symbol.
Find the super- and subscript icons on the Home ribbon to set the character placement.
The good news is that this “works” in any font, and survives changes to the font and probably can be imported into design software with minimal fuss and/or formatting loss. The bad news is, this can look really weird in some font families.
You might prefer a more slanted solidus/slash. Select that from the Advanced Symbol icon at the right edge of the Insert ribbon and insert the slash from there.
Got a gnarly Word problem? Submit your problem and we’ll try to answer it in the Q&A thread.
Remember that satisfying gear-wind and ding of shoving the carriage return back to the left of the page at the end of every line? Some writers do! But Word is not a typewriter. There should be a little pop-up confirmation box when a writer tries to hit the return key at the end of every line. And if they try to hit it twice to create double spacing, a captcha should pop-up, asking if they really want to insert two manual paragraph breaks.
Along the Home ribbon, if the window is wide enough, you can see several Styles for words and paragraphs. Unlike the font and size selections at the left edge of the ribbon, Style sets standard attributes for each kind of text: normal, body, headings, footers, and even comment balloons. And those attributes can be changed throughout a document with a single modification to the style.
Sometimes it’s nice to have comments numbered in a document. That lets you refer to comments by number, which is useful for cross referencing (e.g., “See comment 12 again.”) or for talking about the comments in a transmittal memo, for example. Word used to number comments automatically. It still does, but those numbers are usually hidden. You can see the numbers on comments if you print off the markup, or by looking in the Review Pane. Numbers on comments also reveal themselves when looking at a document in Draft mode.
Modify the style for Comment text, setting the text to automatic numbering:
Select Numbering from the drop-down Format menu at the bottom left of the Modify Styles dialogue box.
Troubleshooting
Windows users may find that comment text is styled as Normal instead of as Comment Text. Changing the Normal style will change all text in the document that is set to Normal, and you probably don’t want to do that.
There are two primary snafus to be aware of when using this numbering method:
The numbering applies to all comments, not just your own. You’ll see that other reviewers’ comments are numbered sequentially along with your own.
As with any numbered list, the numbering will update every time you add or delete a comment, and when you reply to a comment. Remember this if you are cross-referencing comments. Numbers can change; be sure to double check them.
If your comments contain paragraphs, each paragraph will get numbered. To avoid this, use a “soft return” instead of a paragraph break. On a Mac, do this by holding down shift when you hit return.