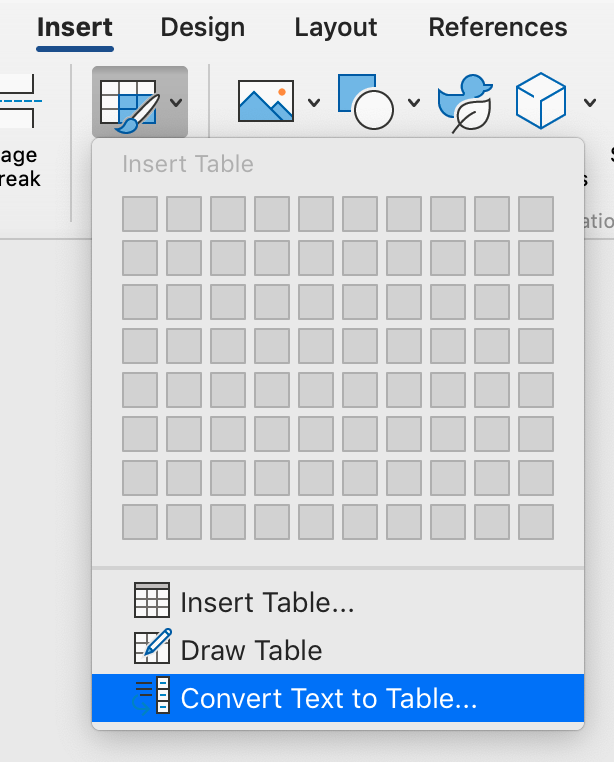
Head on over to Lulu to buy the epub, updated and doubled in size!
In the preface, you’ll find a password for the resource site where you’ll find:
Continue reading New Edition of EIW365 Available Now
Head on over to Lulu to buy the epub, updated and doubled in size!
In the preface, you’ll find a password for the resource site where you’ll find:
Continue reading New Edition of EIW365 Available NowNow double the size, this expanded and updated edition incorporates an entire booklet on working with tables and three sections on ways to customize your workspace and combine and manipulate the features to hack the tools for maximum effect. Plus, it covers all of Word’s updates including changes to Modern Comments, Track Changes, Spellcheck, and the new Editor toolset.
Continue reading Next Edition Coming Soon!QWhere did Spellcheck go!?
AIt’s tucked inside “Editor” now. It’s pretty much the same, except that readability statistics are found in an area of the Editor pane too, not after running Spellcheck. See the demos below.
Continue reading Q&A: Spellcheck Is Now in “Editor” in WordIn this series on working with tables, we’ve converted text into proper tables, detected them, navigated within them, and styled them. Now we’ll dive into to tidying them up.
Some of the things that make tables messy are heads that don’t span what they should, misaligned columns, data that doesn’t align, and headers that should repeat on each page. Let’s start with the first issue: getting the spanning heads right. (Check out the demo video at the end, too.)
Making a header that stretches over several columns takes just two clicks:
Alternatively to step 2, you may select the Merge Cells icon on the [table] Layout ribbon shown below.


Word will combine all the contents of the selected cells into a single cell that spans the selected columns. It’s especially handy that all the contents are combined in cases where the writer tried to fake a spanning header. Just remember to delete the extra line breaks this merging of content creates.
If instead, you need to make a head span fewer columns, you can select the Split Cells icon on the [table] Layout ribbon. Word then asks how many columns to split it into; enter the number of columns right and column edges should line up automatically. Next week we’ll look at how to clean them up if they don’t align.
The contents of the spanning head can be styled as you would other table contents.
Sometimes the changes that were made to a table leave all kinds of background code that make a mess of what you’re trying to clean up. Sometimes, adding a row and starting fresh is easier than fixing all the errors. Occasionally, it’s easier to create a whole new table and do it right the first time.
You may want to turn off Track Changes while you format the table as all the tracking can obscure important changes made to table contents that you want to be sure the authors do vet. A comment could be left summarizing the formatting changes if the authors are concerned.

Check out all the other posts in this series about Working with Tables and learn all about them in the multimedia ebook self-study course!
Got a gnarly Word problem? Submit your problem and we’ll try to answer it in the Q&A thread.


Learn with us! Join a course today.
© This blog and all materials in it are copyright Adrienne Montgomerie on the date of publication. All rights reserved. No portion may be stored or distributed without express written permission. Asking is easy!
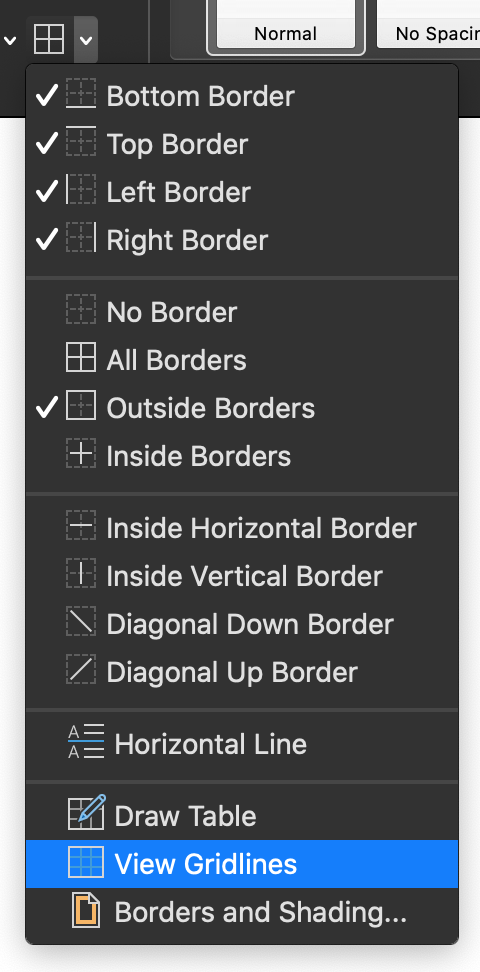
How do you know if text is in a table? In the first post in this series, we saw that tab marks and multiple spaces can help you spot text that has been “typewritered” into a table. Gridlines are a dead giveaway that you’re looking at a table, but what if there are no gridlines? How can you tell then?
These are all really quick checks. Here’s how to do each one.


See these tips in action!
Text may be in a text box rather than a table. If this is the case, you can see the border of the box when you click on the text, or when you right-click on the text, the context menu that pops open will contain the option to Edit Text.

Check out all the other posts in this series about Working with Tables and learn all about them in the multimedia ebook self-study course!
Got a gnarly Word problem? Submit your problem and we’ll try to answer it in the Q&A thread.


Learn with us! Join a course today.
© This blog and all materials in it are copyright Adrienne Montgomerie on the date of publication. All rights reserved. No portion may be stored or distributed without express written permission. Asking is easy!
Right on the Home ribbon in MS Word you’ll find a Sort button. It’s handy for alphabetizing, to be sure, but you can use this as a hack to find duplicates in a bibliography too.
Some bibliographic styles list references in the order they are mentioned within the body of the text. This means they’re in 1, 2, 3 order rather than alphabetized by author name. Especially when a text is team written, duplicate entries can happen, and they’re hard to find when the bib or refs list is long.
Sort, to the rescue! With a couple steps, first. Watch the demo video or follow the 3 easy steps below.

This sort trick can also help you spot small inconsistencies in author names, such as Department for defence vs Department of defence.
Never miss a Word-Wrangling Wednesday tip. Sign up to get them by email. By practicing one tip each week, you can invest 13 hours this year into professional development. To search the blog, use the red-orange bar just above this paragraph.

Want more productivity boosters? Turbo boost your skills and get Word to do the heavy lifting for a change.
Buy the full self-study course and get 115 pages of editor-specific instructions for making the most of MS Word 365. Includes dozens of demo videos for both Mac and Windows users. Field tested since 2011 with editors around the globe.
Got a gnarly Word problem? Submit your problem and we’ll try to answer it in the Q&A thread.


