Sort to Find Duplicates

Right on the Home ribbon in MS Word you’ll find a Sort button. It’s handy for alphabetizing, to be sure, but you can use this as a hack to find duplicates in a bibliography too.

Some bibliographic styles list references in the order they are mentioned within the body of the text. This means they’re in 1, 2, 3 order rather than alphabetized by author name. Especially when a text is team written, duplicate entries can happen, and they’re hard to find when the bib or refs list is long.

Sort, to the rescue! With a couple steps, first. Watch the demo video or follow the 3 easy steps below.

If your version of MS Word doesn’t have menus, go to the Insert ribbon and click the Table icon, then select Convert Text to Table.
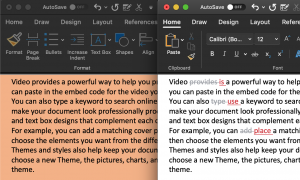
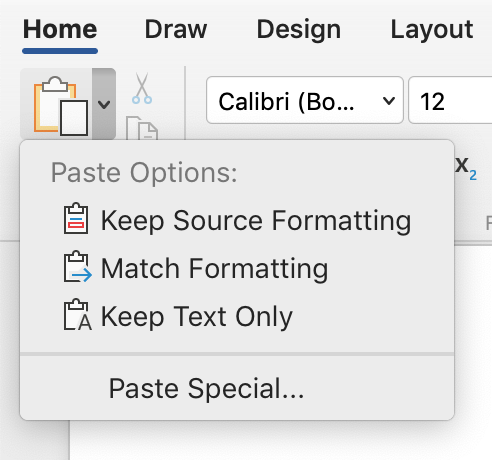
  1. Copy the reference list to a new doc, but when you paste, select Keep text only from the options in the Paste icon on the Home ribbon.
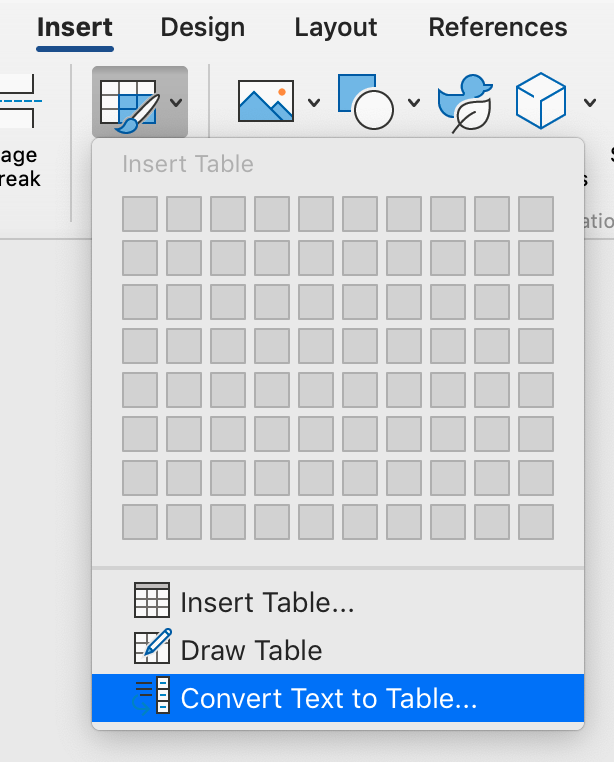
  2. Select all, then select Convert Text to Table either from the menu, as shown in the demo, or from the ribbon as shown in the image below.
  3. Place the cursor in the table, then select the A→Z sort icon on the Home ribbon (beside the ¶).
  4. Tell Word to sort by column 2, and you’re ready to skim the list for duplicates.

This sort trick can also help you spot small inconsistencies in author names, such as Department for defence vs Department of defence.

Troubleshooting

  • Do this in a new document, so you don’t mess with the formatting of the original.
  • To maintain the auto numbering in the original document, make your changes by hand rather than pasting a revised list back into the original.

Never miss a Word-Wrangling Wednesday tip. Sign up to get them by email. By practicing one tip each week, you can invest 13 hours this year into professional development. To search the blog, use the red-orange bar just above this paragraph.

a map "locator pin" styled as the MS Word logo

Want more productivity boosters? Turbo boost your skills and get Word to do the heavy lifting for a change.
Buy the full self-study course
and get 115 pages of editor-specific instructions for making the most of MS Word 365. Includes dozens of demo videos for both Mac and Windows users. Field tested since 2011 with editors around the globe.

Got a gnarly Word problem? Submit your problem and we’ll try to answer it in the Q&A thread.


Version Control, Old-School

Before we had file management systems that took charge of version management, we kept the dead files from getting into print by stamping their pages DEAD.

If you’re like most people, you’re still using some manual type of version control such as changing the file name, instead of version control in project management software you might still be using (like Sharepoint). But who among us hasn’t made changes to the dead file by mistake when both the live and dead files were up on screen?

One easy way to avoid working in the wrong file is to change the background colour of the dead file. That visual cue keeps me from editing the dead file.

dead copy on left with coloured background, beside white live file

On the right side of the Design ribbon, click the Page Color icon and select peach, or blue, or any colour you can still read text on.

design ribbon
Way over on the right side of the Design tab on the ribbon, you’ll find Page Color. Your ribbon may be longer and show more options rather than nesting them.

Troubleshooting

  • Page colour only displays in Print Layout view. Change that on the View ribbon or from the icon along the bottom edge of the window.
  • Change the text colour instead, if you like working in draft view, where background/page colour doesn’t display.
book cover cropped to banner size
Find out more about Best Practices for filing starting on p. 41 of the book.

cover of editing in word 2016 2nd edition

Quick Change: upper- to lowercase, and more

Has your writer used all uppercase letters “for legibility”? Did they use them liberally for emphasis? Fix it all with a click (or 3):

  • Select the text to change, then
  • click the Change Case icon on the Home ribbon and
  • select the preferred style.
Continue reading Quick Change: upper- to lowercase, and more

Curly Quote Catches

Curly quotation marks curve in, toward the content that they bracket.

They look nice, and some would say they facilitate reading ease. But curly quotes can cause snafus with macros, wildcards, and content management systems (CMS) like online education interfaces and website back ends. And sometimes Word just doesn’t want to create a mark with the right curl. Here’s how to fix those snags.

Correcting the Curl

If your quotes (or apostrophes) are simply facing the wrong way, the easiest thing to do is type a second mark beside it then erase the wrong one. Or, use one of the keyboard shortcuts listed in the table below. Alt codes work on both operating systems but Mac users may have to turn on the alt codes (or even the unicode) keyboard first. Windows users should type the first two keys together, then press the keys that follow the comma.

Alt CodeMacWindows
opening single quotealt + 0145opt + ]
closing single quotealt + 0146 opt + shift + ]ctrl + ‘, ‘
opening double quotealt + 0147opt + [shift + “
closing double quotealt + 0148opt + shift + [ctrl + ‘, shift + “

Solving F&R Errors

If your find and replace string isn’t working, or it is royally messing up the manuscript, try replacing all the curly quotation marks with straight ones before you run the F&R. Then change them back.

You can read about how to easily change them in this other post.


Got a gnarly Word problem? Submit your problem and we’ll try to answer it in the Q&A thread.


Learn with us! Join a course today.

© This blog and all materials in it are copyright Adrienne Montgomerie on the date of publication. All rights reserved. No portion may be stored or distributed without express written permission. Asking is easy!

Track Changes Inline or in Balloons

The book and its tutorial videos go into options for seeing Tracked Changes in quite a bit of detail, so here we’ll just compare seeing changes in balloons vs seeing them inline. We’re also sticking with the defaults for colour, underlining, etc. though it’s almost all customizable. (Except for specifying which reviewer is shown in which colour; that’s impossible.)

Continue reading Track Changes Inline or in Balloons

How to Find Highlighting

Editors sometimes use highlighting in MS Word to flag content. My publisher clients have asked me to highlight design and production instructions within the text, and I use highlighting to flag item for fact checking or a second look. (Design instructions include things like [table near here] and [note this is a mu symbol].)

Therefore, one of my final checks on a file is to review all the highlighting. Word makes this easy, using the Advanced Find and Replace to skip through all instances of highlighting.

Continue reading How to Find Highlighting

Paste Options in Word 365

Not nearly as flavourful as that paste we ate in preschool, but maybe more useful, Word has several options for you to paste content with. Get at the the options from the ribbon. Just click the little down arrow beside the Paste button on the left end of the Home ribbon to see the options.

Here’s how they’re useful:

Continue reading Paste Options in Word 365

Quick Trick to Remove Hyperlinks

They got rid of Clippy but not many of the other annoying automated features in MS Word. Automatic formatting is something that most editors want to turn off before they work. In fact, this is why turning off most automation is covered in the “Get Ready to Edit” section of the book.

When you get a document in which all of the URLs (web addresses) are blue and underlined, and active (hyperlinked), you’ll most likely want to remove them so they don’t cause design problems or (horrors!) end up in print. You can do this one at a time, or in one fell swoop (globally).

Continue reading Quick Trick to Remove Hyperlinks

Fonts for Editing

a map "locator pin" styled as the MS Word logo
To learn more about fonts for effective editing, see Section 36 of the book.

Font geeks love to debate readability and myriad other details about fonts. The other thing that matters when editing is being able to tell when the wrong character has been used. Font choice can cleverly conceal a wrong character hiding in a document: a 1 looks like an l, a superscript o looks like a °, an ‘ masquerades as a ′…

screen capture showing one and ell are nearly identical in Times New Roman font as well as the similarity between a superscript letter O and a degree symbol.
Times New Roman makes telling the difference between a 1 and an l nearly impossible. The superscript O versus the degree symbol is easier to spot; if you know what it should look like, that is.
colour reveals which character is the one
The pink character in this word is actually the digit one. There are some indicators such as spacing and height, but it’s not easy to tell at usual working magnification.

Changing the font to one that shows a more drastic difference between characters is one solution. Some editors prefer to edit in Helvetica, Calibri, or Verdana for just such a reason. If you modify the font of the “Normal” Style, it’s easy to undo this font change before finalizing the file. The client will never know the trick that helped you spot those apostrophes that should be primes. Just turn off Track Changes when you change the font.

screen capture showing one and ell are clearly different in Verdana font as well as the similarity between a superscript letter O and a degree symbol.
Verdana shows clear differences between the one and ell but if you didn’t know what a degree symbol (right) looked like, it might be easy for the superscript letter O to pass itself off.
a map "locator pin" styled as the MS Word logo
If this was helpful, you might want to explore even more radical formatting that boosts editing!
Calibri makes differences very clear, once you know what a degree symbol should look like.
Helvetica is an editor favourite, and it’s easy to see why in this example.


Got a gnarly Word problem? Submit your problem and we’ll try to answer it in the Q&A thread.


Learn with us! Join a course today.

© This blog and all materials in it are copyright Adrienne Montgomerie on the date of publication. All rights reserved. No portion may be stored or distributed without express written permission. Asking is easy!


Find a better way through Word