With the introduction of the Editor pane, Word changed the look of Spellcheck. But you can still access the classic Spellcheck interface by adding it to the Quick Access Toolbar! You can see that at the very top of the image above.
Learn more about shortcuts and productivity boosters throughout the self-study book.
If you are using control + S to save like you’ve got a twitch (and what MS user hasn’t learned to save obsessively), you already know that shortcuts will save you a lot of time over using menus. Here are some surprising, lesser-known keyboard shortcuts that will speed up your productivity.
Mac users click the down arrow beside the Find field in the Find and Replace pane to select the Graphics option. (Do not select the gear icon.)
Images can be integral content in a manuscript: graphs convey huge volumes of data and information about their relationships; flowcharts relay sequences and relationships; pictures convey context and describe scenes. Images need to be seen while developing a manuscript or reviewing one, because they are so important. But images can also make files enormous to the point of crashing Word or email. Rather than deleting images one by one so that you can work with the file, delete them all at once with this simple Find and Replace in the Find/Navigation panel:
The good news is that Google Docs plays well with Word, now. The bad news is that this requires you to (and only works if you do) export the document into a Word file, work on it, and then re-upload it to Google Docs when you are done.
I’ve let a couple of my editing students use it (for reasons) and am thrilled to find that Google Docs now produces great markup of the Tracked Changes and Comments when it makes a Word file. It also maintains my markup and comments from Word when I reupload it to Google Docs!
I still do better, faster editing work by using all my macros, plug-ins, and dozens of other customized tools in Word, so this compatibility is very hopeful news.
Markup Using Google Docs
The Suggesting feature in Google Docs marks up text much like Word does with Track Changes and Comments. The reason you want to use this is not only so that the changes stand out for review and can be easily accepted or rejected and so that comments are easy to find. More importantly, by leaving “suggestions” and tracked changes, you avoid having your comments and other infelicities end up in the final product because someone missed deleting them! This has happened many times and it is always an enormous embarrassment as it’s shared widely across the internet.
In Google Docs, click on the speech bubble icon at the top right of the screen. This opens the small menu shown in the image below. Click the Suggesting option to turn on the tracking mode. Then, type additions and delete text without further concern—they will be tracked. Add comments by clicking the speech bubble icon with the plus—the one just to the left of the pop-down menu in the example below.
Troubleshooting
Do not let the writer keep working on the Google Doc while you are editing in Word. These are now two separate versions of the file—the on in GDocs and yours in Word—and their changes will not be incorporated into your edits. You’ll be uploading a new version, separately, since you can’t upload–convert into an existing Google Doc. Ideally, you will lock the old Google Doc from further changes.
At minimum, add in a very large, colourful font at the top of the original Google Doc reading: DEAD FILE. Changing the colour and font family of the body content would also give visual signals that it is not the file to work on. Also change the doc’s name to include the words dead file.
While you might be frustrated by the seemingly endless updates (changes) to Microsoft products, Google Docs updates even more often. So what I say here may be out of date by the time you read it. So far, Google Docs keeps getting better and more functional. So let’s hope that’s what you find.
Styles and internal cross-references do not get carried over elegantly from Word to Google Docs. Just be aware of this, and plan on fixing the flubs in production/layout.
Missing all your Word tools because you’ve got a PDF to mark up? Never fear!
Open Word, then tell Word to open the PDF file. It’s that simple. Word will import all of the text and graphics so you can access your macros, plug-ins, and other secret Word weapons to proofread the content. No need to pay for any third-party translation or shell out for Acrobat Pro! Word has you covered.
Any changes will have to be transcribed onto the PDF, not simply tracked in the Word file; but that’s easy. This quick tutorial shows how to leave professional proofreading markup using the industry standard free software: Adobe Acrobat Reader.
Troubleshooting
Bad breaks or false ones may occur at the bottom of pages where footers including folios are set in text boxes. Some body text and captions may also appear in text boxes. Be sure Word is including such text in any checks, and be prepared to excuse layout weirdness. You’ll have to check design elements on the PDF itself.
If there’s any markup on the PDF, Word will try to replicate it, too. Just be aware of it so you can ignore those sections.
Got a gnarly Word problem? Submit your problem and we’ll try to answer it in the Q&A thread.
Q Is there a sure-fire way to select just the content of a table cell, or a single cell vs the whole table? Word seems to have its own views on what I should be selecting.
A Arrow keys are the most precise way to select text or cells (even rows and columns) in a table, but double-clicks and triple clicks are great shortcuts:
Shift + arrow selects individual characters until it reaches the end of a cell, then it switches to selecting whole cells.
Double-click the mouse to select a single word.
Triple-click the mouse to select a whole cell.
The (table) Layout ribbon offers some selection options. Click the Select icon on the far left. This is great when your hand isn’t feeling steady enough to activate the selection arrow by hovering at the top or left side of the table column/row, or when Word is having a tantrum. Just make sure the cursor is already placed in a cell within the column/table you want to select.
Use the grab point at the top left of a table to select the whole table. Click inside the table or hover the pointer over it to reveal the grab point.
Troubleshooting
To reveal the (table) Layout ribbon, place the cursor in the table. If the ribbon does not appear, you’re not working in a true table. Reveal hidden characters and you’ll likely find that the alignment was forced (faked) with spaces and tab marks. Undo that shit.
Note this (table) Layout ribbon is different from the Layout ribbon that is always visible (I’ve crossed out that other Layout tab at the left end). This special ribbon appears only when the cursor is inside a table.
If the content you want to select is at the end of a cell, it can be nearly impossible to select just that bit rather than the entire cell. Add a character (say, a period), then select up to that point (which will no longer be the end of the cell). Remember to delete that extraneous mark afterward!
To make sure you’ve selected an entire row (and not just the cells), look for the row end marker selection. See this in action in the demo video below at about minute 1:08.
QWhen running a full Spellcheck, Word won’t suggest the right word. What can I do besides writing down the misspelling and searching it out later to correct it manually?
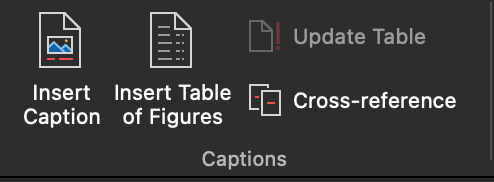
AYou’re in luck! Just click in the document itself and make the change (Fig. 1), then return to the Spellcheck (now called Editor) window and resume. See details and demo video below.