
QI copied text with formatting I don’t want to keep. How can I paste it without that formatting?
AEasy! There’s both a built-in keyboard shortcut and a button:
Continue reading Q&A: How can I paste without formatting?QI copied text with formatting I don’t want to keep. How can I paste it without that formatting?
AEasy! There’s both a built-in keyboard shortcut and a button:
Continue reading Q&A: How can I paste without formatting?Word files can get bloated, taking up far more MB than they should. If you’re dealing with a book-length manuscript full of tracked changes and comments, that bloat can bog down the computer and lead to failures, glitches, and basic Office malfeasance.
Continue reading Shrink Files by Deleting Unused StylesClick less when resolving tracked changes with this pro tip!
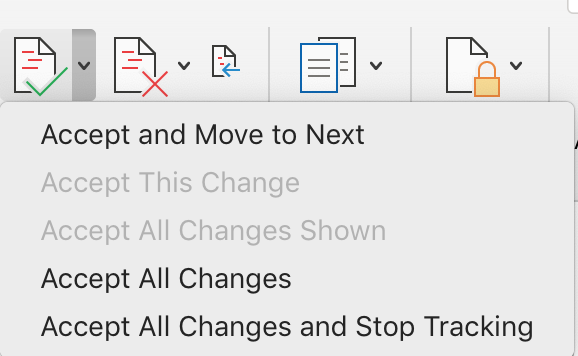
Reject changes you do not like, and leave the rest. That leaves a
document full of changes that you do want to accept. Then, select Accept All Changes from the Review ribbon and clean up the file with a single click!

Always give a document a once-over in Simple Markup or No Markup view before submitting it as a finished edit. This often reveals a bunch of formatting errors that arise from working with markup displayed (that is, with Track Changes visible). Common errors often obscured by the redlining on the screen include:
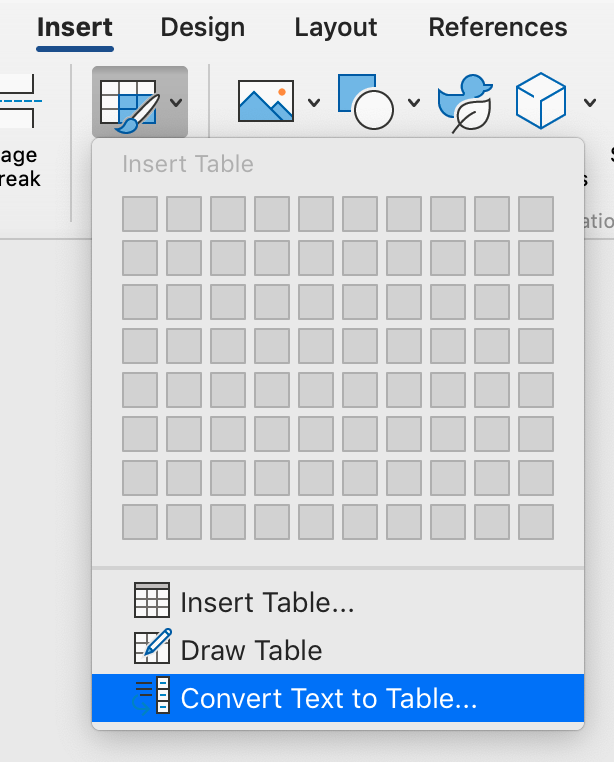
Whether you need a word count for estimation or billing purposes, or for something else entirely, MS Word comes to the rescue. There are two easy ways to get text from a PDF into Word:
Pasting text into Word is simplest, but it doesn’t work with every file type. To get the whole contents of a slide set, for example, first print the slides to PDF, then copy all from that new file.
Open Word, then tell it to open the PDF. Word will convert the PDF and the Word count will appear along the bottom edge of the screen.

It may take a few seconds for Word to do its count; just wait. If it seems stalled, scroll down a few pages or go right to the end.
Word can make all kinds of errors detecting the text in a PDF, especially if that PDF was a scan rather than a “print” of an original file. (Misread ligatures and insert spaces mid-word.) Word will also include all of the markups and notes made to the PDF, and if those notes overlap text, that text will be excluded. Body text from a marked-up PDF is best gotten into Word by the copy–paste method.
This captures the running feet and heads too. If the word count needs to be precise, do a search-and-destroy for those.
Yes, you can export a slide set as an RTF, but we’re talking PDFs here.
Got a gnarly Word problem? Submit your problem and we’ll try to answer it in the Q&A thread.


Learn with us! Join a course today.

© This blog and all materials in it are copyright Adrienne Montgomerie on the date of publication. All rights reserved. No portion may be stored or distributed without express written permission. Asking is easy!
Right on the Home ribbon in MS Word you’ll find a Sort button. It’s handy for alphabetizing, to be sure, but you can use this as a hack to find duplicates in a bibliography too.
Some bibliographic styles list references in the order they are mentioned within the body of the text. This means they’re in 1, 2, 3 order rather than alphabetized by author name. Especially when a text is team written, duplicate entries can happen, and they’re hard to find when the bib or refs list is long.
Sort, to the rescue! With a couple steps, first. Watch the demo video or follow the 3 easy steps below.
This sort trick can also help you spot small inconsistencies in author names, such as Department for defence vs Department of defence.
Never miss a Word-Wrangling Wednesday tip. Sign up to get them by email. By practicing one tip each week, you can invest 13 hours this year into professional development. To search the blog, use the red-orange bar just above this paragraph.

Want more productivity boosters? Turbo boost your skills and get Word to do the heavy lifting for a change.
Buy the full self-study course and get 115 pages of editor-specific instructions for making the most of MS Word 365. Includes dozens of demo videos for both Mac and Windows users. Field tested since 2011 with editors around the globe.
Got a gnarly Word problem? Submit your problem and we’ll try to answer it in the Q&A thread.
Has your writer used all uppercase letters “for legibility”? Did they use them liberally for emphasis? Fix it all with a click (or 3):

They look nice, and some would say they facilitate reading ease. But curly quotes can cause snafus with macros, wildcards, and content management systems (CMS) like online education interfaces and website back ends. And sometimes Word just doesn’t want to create a mark with the right curl. Here’s how to fix those snags.
If your quotes (or apostrophes) are simply facing the wrong way, the easiest thing to do is type a second mark beside it then erase the wrong one. Or, use one of the keyboard shortcuts listed in the table below. Alt codes work on both operating systems but Mac users may have to turn on the alt codes (or even the unicode) keyboard first. Windows users should type the first two keys together, then press the keys that follow the comma.
| Alt Code | Mac | Windows | ||
| ‘ | opening single quote | alt + 0145 | opt + ] | ‘ |
| ’ | closing single quote | alt + 0146 | opt + shift + ] | ctrl + ‘, ‘ |
| “ | opening double quote | alt + 0147 | opt + [ | shift + “ |
| ” | closing double quote | alt + 0148 | opt + shift + [ | ctrl + ‘, shift + “ |
If your find and replace string isn’t working, or it is royally messing up the manuscript, try replacing all the curly quotation marks with straight ones before you run the F&R. Then change them back.
You can read about how to easily change them in this other post.
Got a gnarly Word problem? Submit your problem and we’ll try to answer it in the Q&A thread.
Learn with us! Join a course today.
© This blog and all materials in it are copyright Adrienne Montgomerie on the date of publication. All rights reserved. No portion may be stored or distributed without express written permission. Asking is easy!
Editors sometimes use highlighting in MS Word to flag content. My publisher clients have asked me to highlight design and production instructions within the text, and I use highlighting to flag item for fact checking or a second look. (Design instructions include things like [table near here] and [note this is a mu symbol].)
Therefore, one of my final checks on a file is to review all the highlighting. Word makes this easy, using the Advanced Find and Replace to skip through all instances of highlighting.
Continue reading How to Find HighlightingWord’s “autocorrect as you type” feature can be used as a built-in text expander to save you thousands of keystrokes over a single day. Here are ten suggestions to get you started.
Once you’ve started entering these “shortcuts” you’ll start noticing other times that an expander can be put to use. Maybe it could enter your mailing address, or the entire intro text for a file transmittal message!
This is also where you’ll find that (TM) turns into a proper ™️ symbol, and more!

Mac users, open Word Preferences and click AutoCorrect.
Windows users, go to File > Options > Proofing. Then click the AutoCorrect Options…
Be sure to close down Word so that these changes are saved. If Word crashes before you shut down, all your new AutoCorrects will be lost.
How do you put AutoCorrect to use? Join the conversation on Blusky or Facebook using the hashtag #eiw365.